Create Category Attribute in Magento 2
Let’s say you need to create a slide showing subcategories within the parent categories including their image information and names. Although Magento’s Category already has an image attribute, you want it to be a banner image so you need to create another image attribute. In this article, we will practice create category attribute in Magento.
Because in Magento already has an input form for the category, our job is just to expand it to add a new attribute.
If you are just starting out, you can read the article Create Magento 2 extension step by step first.
1. Create Install data file
Now, Create an InstallData.php file and put it in the location app/code/Magerubik/simple/Setup/InstallData.php and paste the below code.
<?php
namespace Magerubik\simple\Setup;
use Magento\Eav\Setup\EavSetupFactory;
use Magento\Framework\Setup\InstallDataInterface;
use Magento\Framework\Setup\ModuleContextInterface;
use Magento\Framework\Setup\ModuleDataSetupInterface;
class InstallData implements InstallDataInterface
{
    private $eavSetupFactory;
    public function __construct(EavSetupFactory $eavSetupFactory)
    {
        $this->eavSetupFactory = $eavSetupFactory;
    }
    public function install(ModuleDataSetupInterface $setup, ModuleContextInterface $context)
    {
        $eavSetup = $this->eavSetupFactory->create(['setup' => $setup]);
        $eavSetup->addAttribute(
            \Magento\Catalog\Model\Category::ENTITY,
            'category_thumbnail',
            [
                'type'         => 'varchar',
                'label'        => 'Category Thumbnail',
                'input'        => 'image',
				'backend' => 'Magento\Catalog\Model\Category\Attribute\Backend\Image',
                'sort_order'   => 5,
                'global' => \Magento\Eav\Model\Entity\Attribute\ScopedAttributeInterface::SCOPE_STORE,
                'visible'      => true,
                'required'     => false,
                'user_defined' => false,
                'default'      => null,
                'group' => 'General Information'
            ]
        );
    }
}
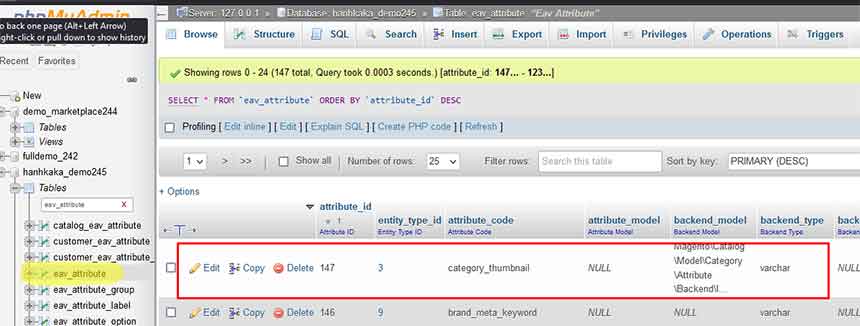
This file create new attribute in table ‘eav_attribute‘ like below:
2. Show Image attribute field in admin
Let’s create extened category_form.xml file put in app/code/Magerubik/simple/view/adminhtml/ui_component/category_form.xml and paste the below code.
<?xml version="1.0" ?>
<form xmlns:xsi="http://www.w3.org/2001/XMLSchema-instance" xsi:noNamespaceSchemaLocation="urn:magento:module:Magento_Ui:etc/ui_configuration.xsd">
    <fieldset name="general">
		<field name="category_thumbnail" sortOrder="40" formElement="imageUploader">
            <argument name="data" xsi:type="array">
                <item name="config" xsi:type="array">
                    <item name="source" xsi:type="string">category</item>
                </item>
            </argument>
            <settings>
                <elementTmpl>ui/form/element/uploader/image</elementTmpl>
                <dataType>string</dataType>
                <label translate="true">Category Thumbnail</label>
                <visible>true</visible>
                <required>false</required>
            </settings>
            <formElements>
                <imageUploader>
                    <settings>
                        <required>false</required>
                        <uploaderConfig>
                            <param xsi:type="url" name="url" path="catalog/category_image/upload"/>
                        </uploaderConfig>
                        <previewTmpl>Magento_Catalog/image-preview</previewTmpl>
                        <openDialogTitle>Media Gallery</openDialogTitle>
                        <initialMediaGalleryOpenSubpath>catalog/category</initialMediaGalleryOpenSubpath>
                        <allowedExtensions>jpg jpeg gif png</allowedExtensions>
                        <maxFileSize>4194304</maxFileSize>
                    </settings>
                </imageUploader>
            </formElements>
        </field>
    </fieldset>
</form>
Finally run the commands below and then go to the magento backend to see the result
php bin/magento setup:upgrade
php bin/magento cache:flush
php bin/magento indexer:reindex
If it looks like the screen below then everything is ok
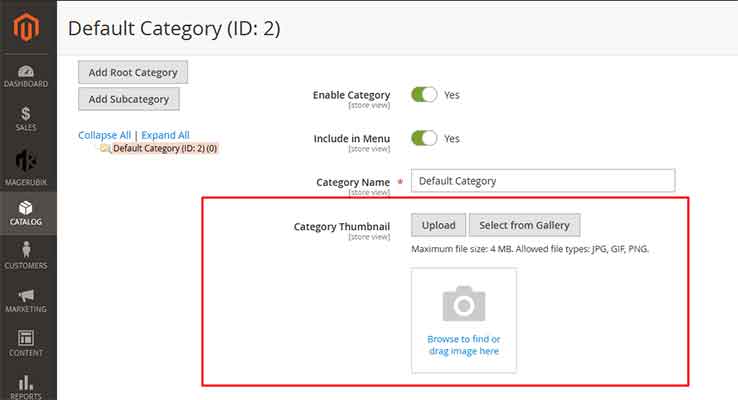
Please add knowledge of input data types in magento 2 and practice with it, good luck. In the next posts we will learn How to create product type in Magento 2. Contact us if you face any problems during the installation process.
You can download the demo code for this entire series from GitHub